Cover UI board assembly
This describes custom Cover UI board assembly.
Using the kit
Kit will come with board partially assembled: ICs, buttons and minor SMD components pre-soldered.
Early boards marked WIP had a blue patch wire. You don’t need it, ignore it on the photos.
- solder front side LEDs. Don’t forget spacers. Align cut on the LED with barely visible cut on the silkscreen. To the right if looking from the front side.
- solder back side connectors
- solder back side buzzer (round pin is
+). Early versions had silkscreen+on wrong side, be careful. - solder Pico Dev board, either directly to the board or use pin headers (not included in the kit)
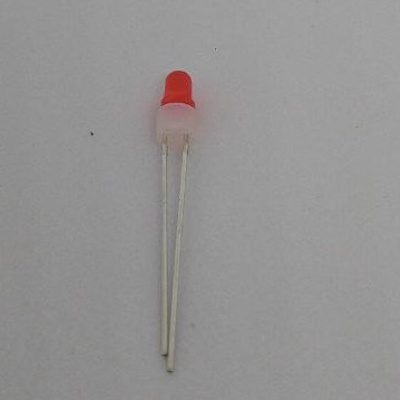 1 Insert LED into spacer
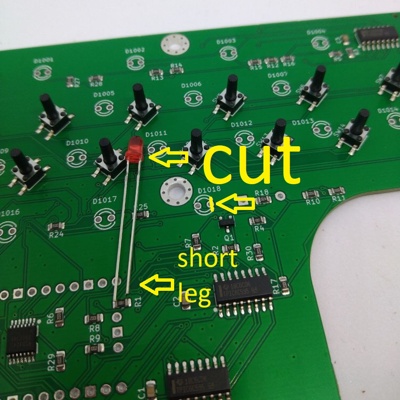 2 Align cut in LED with cut on silkscreen
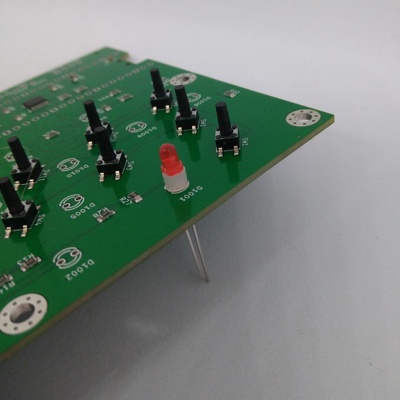 3 Short leg to the right (front)
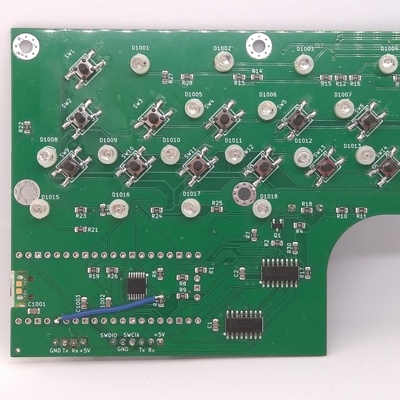 4 Solder LEDs on front side (ignore the blue wire)
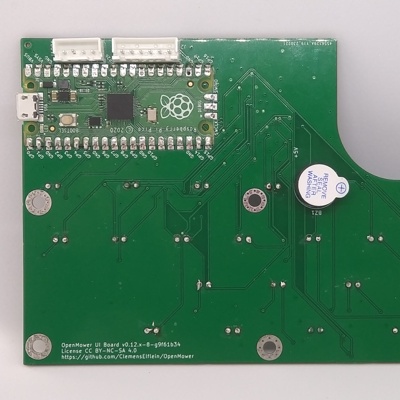 5 Solder back side
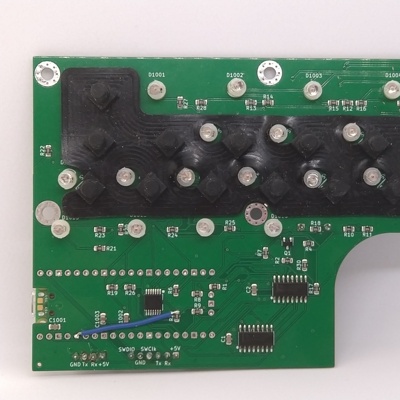 6 Put the rubber protector on
After that, upload the cover UI firmware to Pico Board: https://github.com/ClemensElflein/CoverUI/releases/latest
You need .uf2 file from firmware.zip. Hold BOOT button on Pico, insert USB and drag .uf2 to Pico disk drive.
This is described in more details in MicroPython guide, you can follow that, just use our .uf2 file instead.
Meaning of the LEDs
- 1st row : 2hr-8hr act as 4 digit progressbar for GPS quality. Blink = uncalibrated.
- 2nd row:
- S1: General state. On = ROS is running but idle, Blink-slow = ROS in autonomous mode (either mowing, docking or undocking), Blink-fast = ROS is recording or any other state (only in undocked state).
- S2: Sub status depending on the general state.
- Idle: Off.
- Area recording: Blink-slow = Record outline, Blink-fast = Record obstacle.
- Mowing: Off.
- Docking: Blink-slow.
- Undocking: Blink-fast.
- Lock: Not used.
- 3rd row : Mon-Sun act as 7 digit progressbar for battery charge state (only in undocked state).
- 4th row :
- Lifted: Emergency status. On = no heart beat for more than 0.5s, Blink-fast = Stop button, Blink-slow = Lifted or tilted, Off = no emergency.
- Wire: GPS Status. On = < 25%, Blink-fast = < 50%, Blink-slow < 75%, Off >= 75%.
- Battery: On = Battery empty.
- Charging: Fast blink = empty. Slow blink = approx. 1/2 charged. On = Fully charged.
Button usage
State = Idle
- Home: don’t do anything since the assumption is that idle = docking station.
- Play: Start mowing of recorded area(s).
- S1: Start recording area(s).
- S2 (press 2s): Delete area(s) and docking point.
State = Area recording
- Home: Stop area recording and go to docking station (if any).
- S2 (press 2s): Delete area(s) and docking point.
State = Mowing
- Home: Go to docking station.
- Play: Continue.
- S1: Pause.
- S2: skip over to next mowing area.
State = Docking
State = Undocking
Any state
- Lock (press 2s): reset emergency mode (beta version doesn’t support it but alpha does).
Joystick usage
- State = Area recording
- A + Left stick button: Move mower slowly.
- A + LB + Left stick button: Move mower fast.
- B: Start/Stop recording a polygon (first one if the main area, following polygons are obstacles within the current main area).
- Y + Pad-Up: Finish the current area and save it as a navigation area.
- Y + Pad-Down: Finish the current area and save it as a mowing area.
- X: Save docking positions (first and second).
- Not available in other states
Last modified October 27, 2024: feat: initial compatible mowers list and nonOS part from reverted #11 (#38) (a3ee6ab)