Record a Map
In this section, we finally drive the robot around and test if everything works as expected. Then we will record a map, and you can see the magic happen.
Prerequisites
- A smartphone or PC
- Modified robot connected to your network
- OpenMower software running on the robot
- Docking station modified and powered up
- Mower fully charged
Step 1: Check the GPS

For this step, put the mower into the docking station and turn it on. It should boot up and get to a solid green status LED.
It is important that the mower is out in the open for the RTK GPS to work. Don’t try this indoors and don’t cover the mower.
Open the OpenMower web app with any device by opening a browser and going to the following URL: http://openmower.local:8080 or http://<your-openmower-IP>:8080.
Wait for the GPS to find a position. This might take some time (up to 30 minutes).
You can see the current GPS quality in the Open Mower app as shown in the graphic above.
You need to have RTK Fixed for the following to work. If you don’t get a good GPS fix, you will need to check your RTK setup and configuration.
Step 2: Initialize the Orientation
In addition to the position, the robot also needs to know its orientation. Since we are not using a compass, the robot’s orientation is derived from its movement. In order to initialize the orientation, you need to drive the robot.
You can either use the on-screen joystick in the Open Mower App or a gamepad connected via USB (hold the A button) to drive the robot.
Warning
Don’t pick up the mower or the orientation will be lost again!Now drive the mower for at least 50m, do some straight lines and some figure eight patterns. Currently, the robot does not know the quality of its orientation estimate, but you can judge by driving and looking at the app.
The orientation is initialized correctly if:
- When driving a straight line, the visualization also drives a straight line (no jumps)
- When rotating in place, the visualization stays in place and doesn’t jump
Step 3: Record a Simple Map
In this step, we will record a simple map. Keep it simple for the first tests and record your map as soon as you’re confident that everything works as expected.
The map for the mower consists of three parts: the docking position, at least one mowing area and optionally navigation areas.
Mowing Areas are the areas which will be mowed. Each mowing area has a single outline and optional areas to exclude (e.g. static obstacles).
Docking Position is the position and orientation of your docking station. It needs to be close to a mowing area or navigation area. This is needed for the robot to find its way to the docking station.
Navigation Areas are areas similar to mowing areas (they consist of an outline and optionally exclusions). The mower is allowed to drive in these areas, but won’t mow. Use these areas to connect mowing areas. Also, if your docking station is not close to a mowing area, you can use a navigation area to allow the robot to drive to the docking station.
Now that the robot knows where it is located, and you know which areas we need to record, start recording your first map. In the following picture, you can see an example.
Record Outline
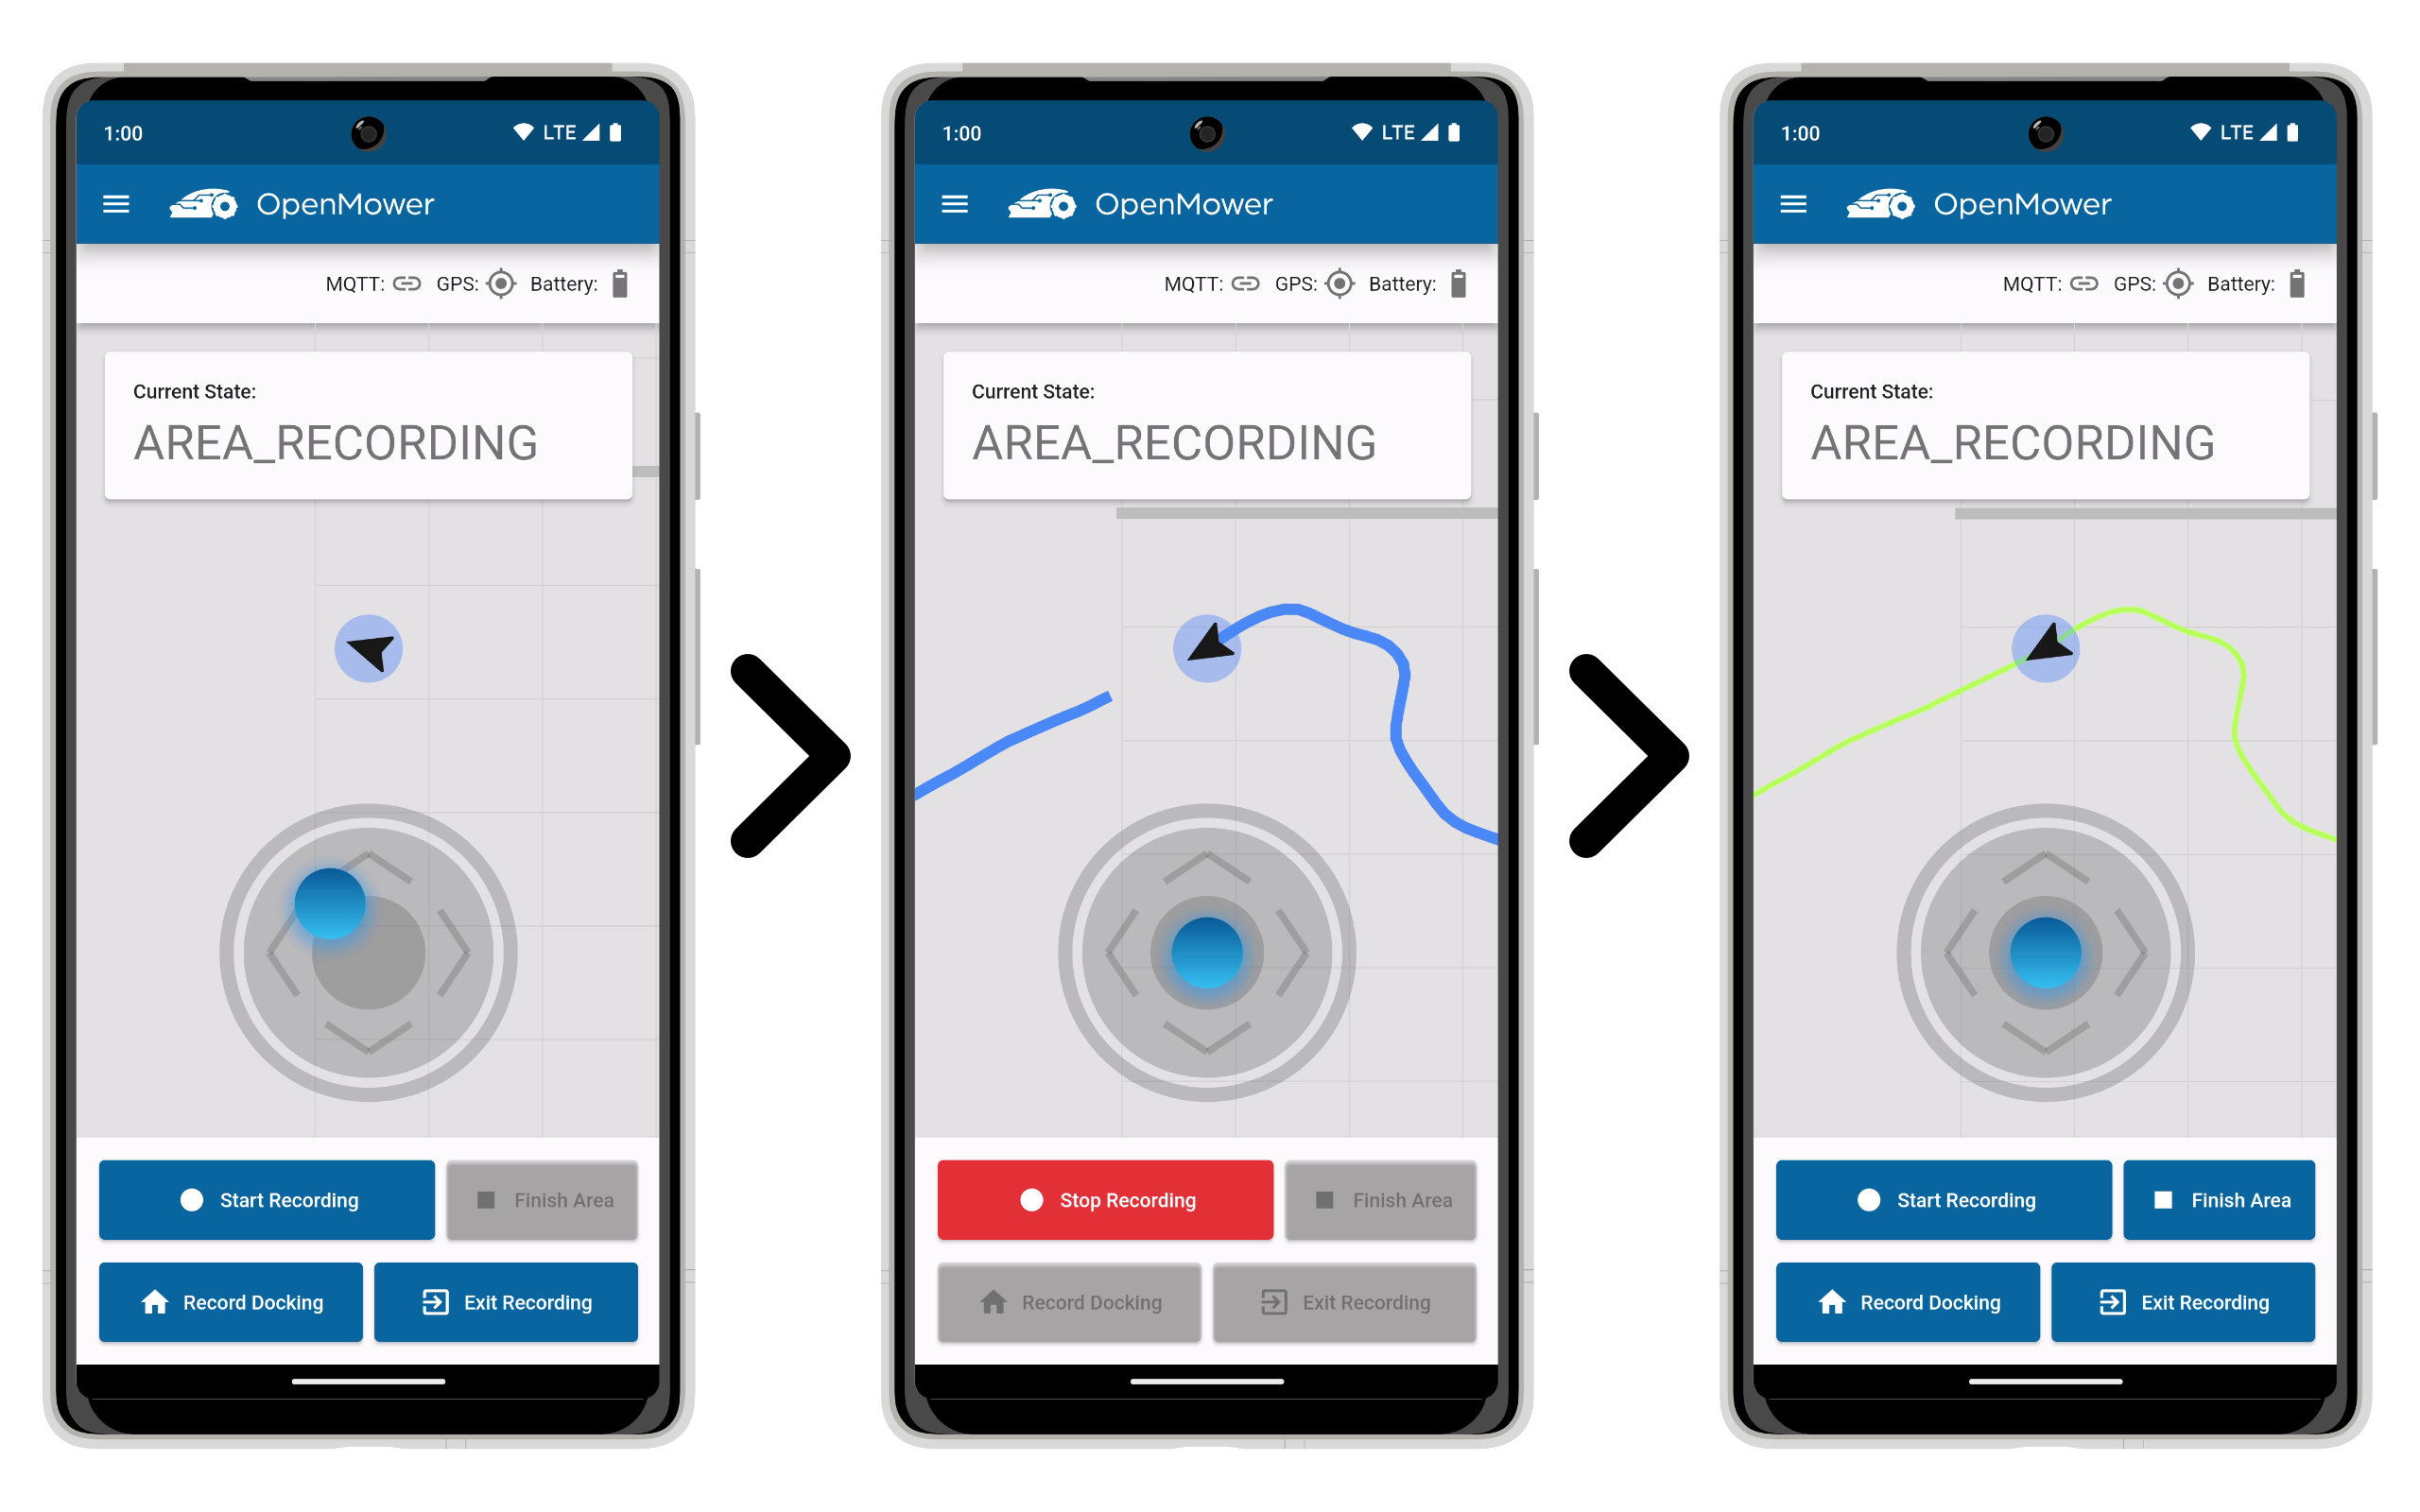
- Drive the robot to the outline. Make sure that the robot is facing in counterclockwise direction.
- Start the recording by pressing Start Recording.
- Drive around the mowing area. Make sure that the GPS position stays fixed at all times.
- Stop the recording using Stop Recording.
- The outline should now turn green. This means it’s done recording, and you can move on to recording exclusions.
Optional: Record Exclusions
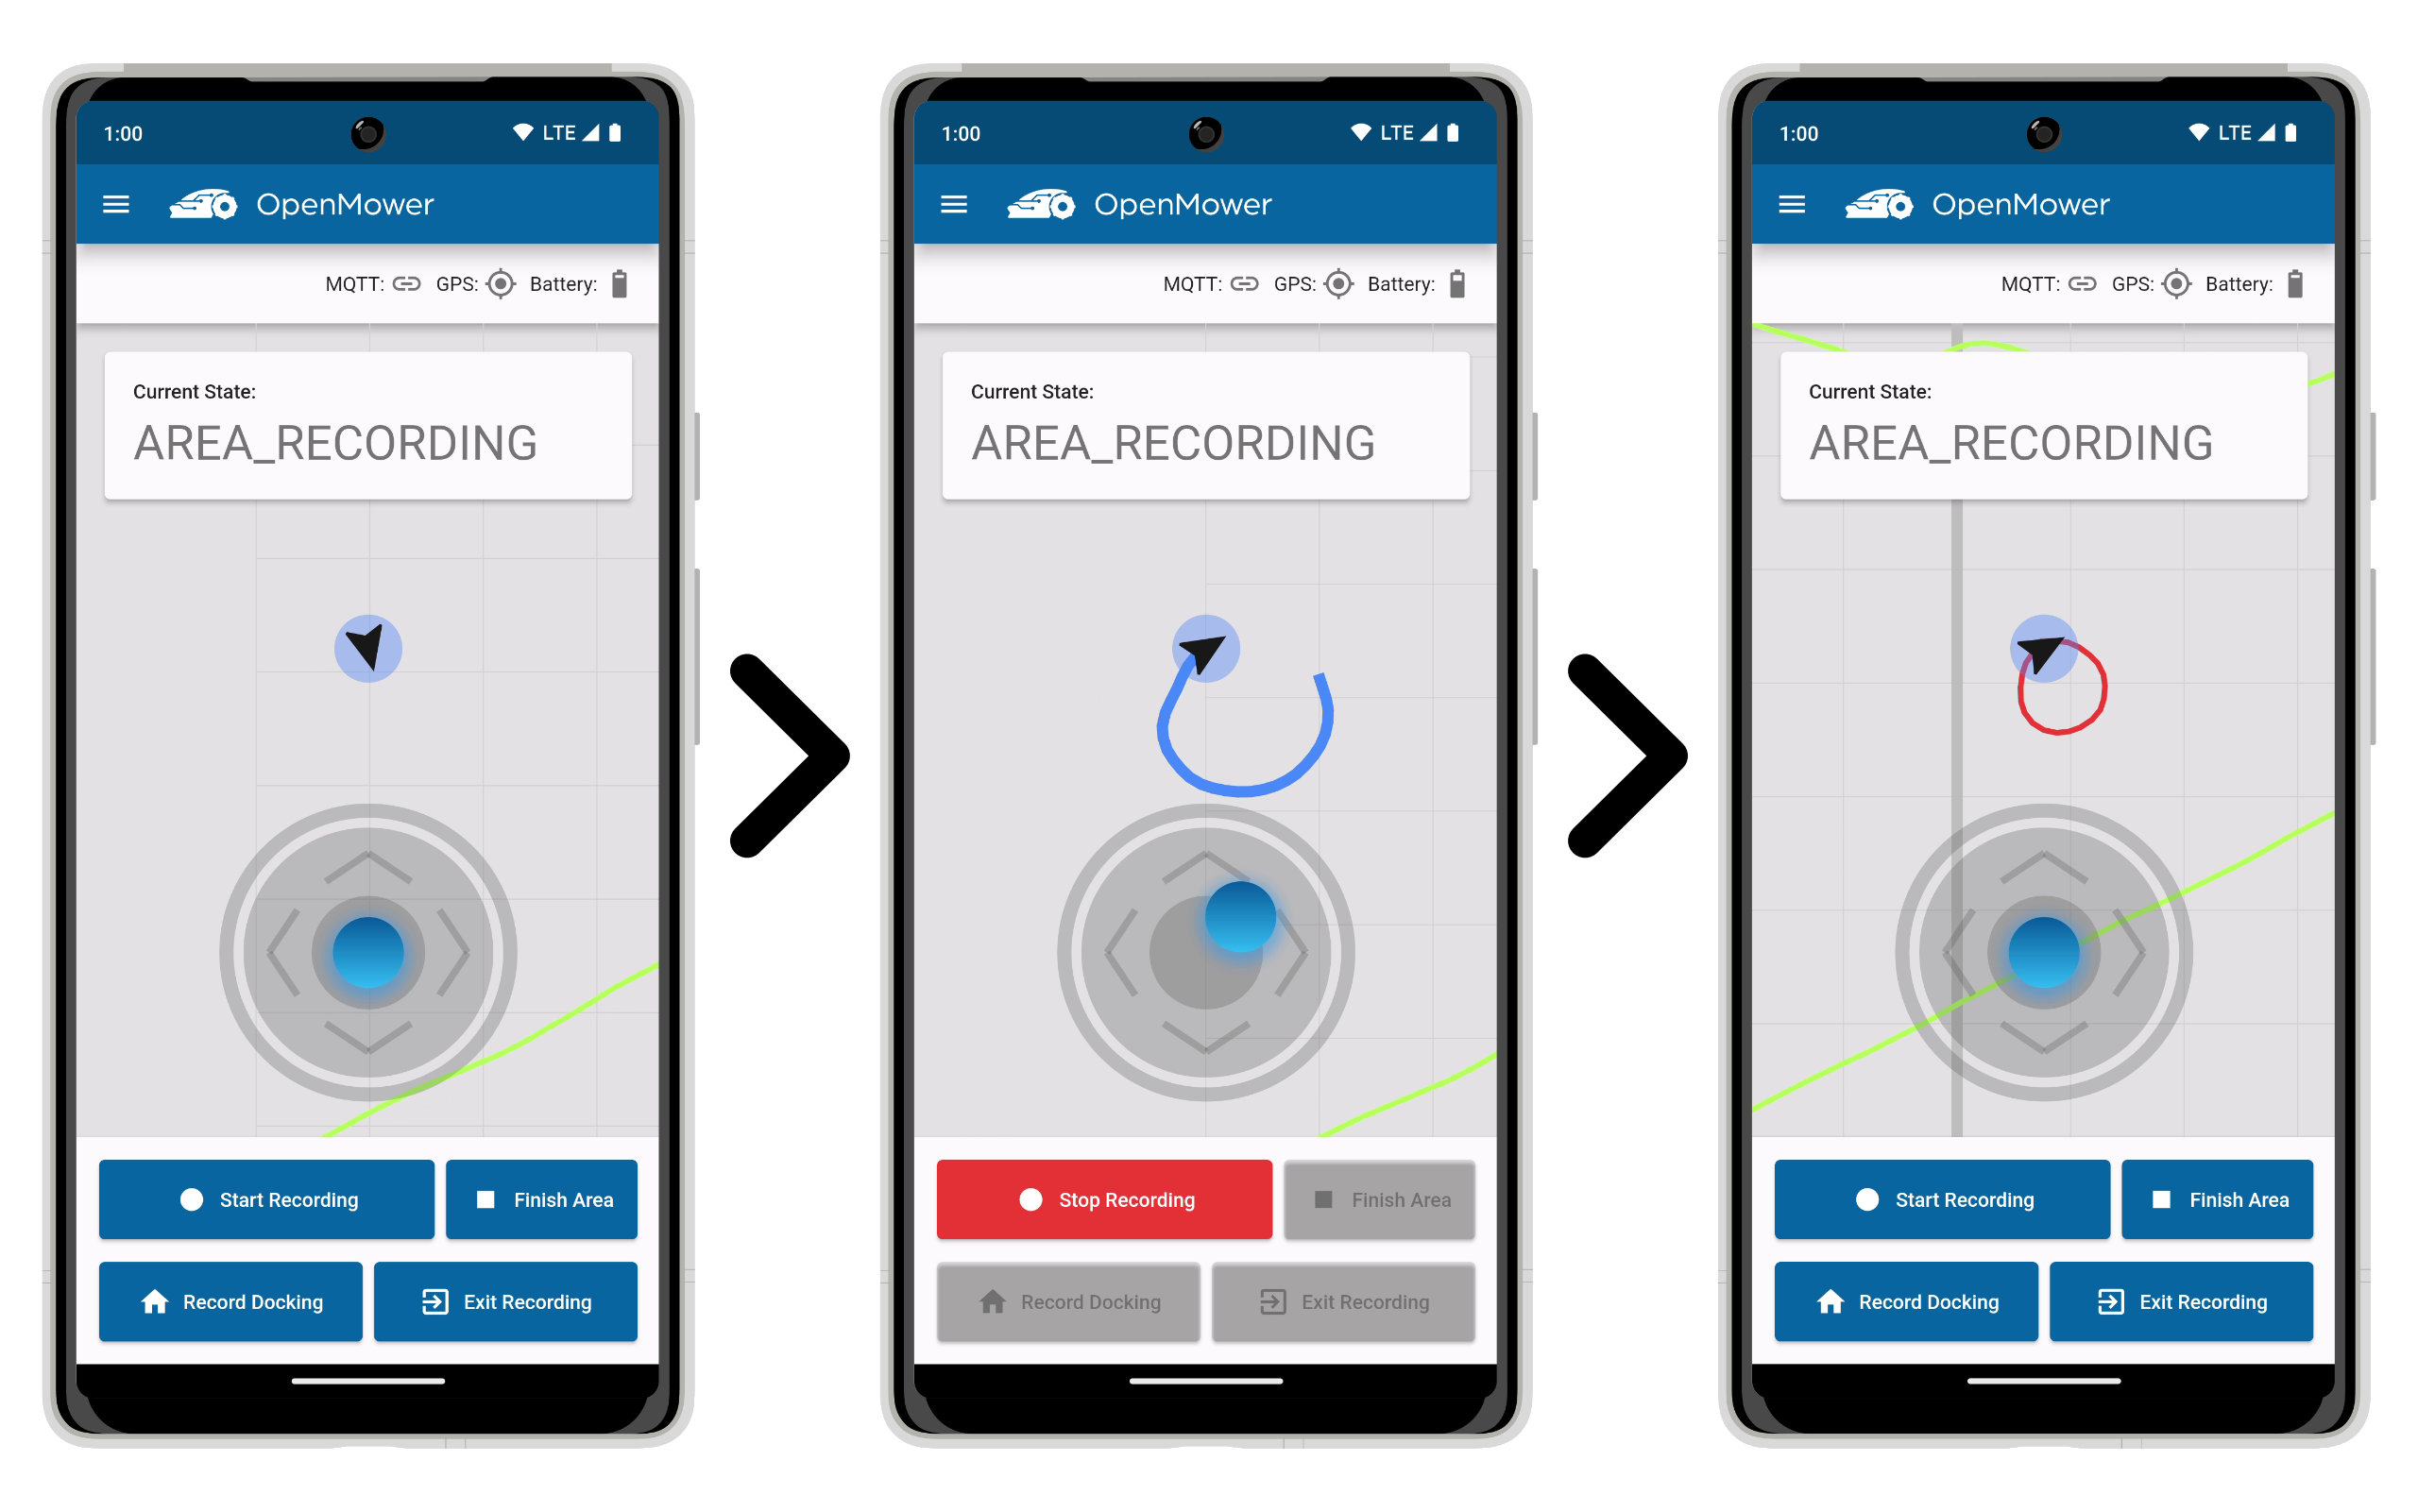
If your area has zones you want to exclude (e.g. static obstacles), you can record them like this:
- Drive the robot to the edge of the exclusion zone. Make sure that the robot is facing in clockwise direction.
- Start the recording by pressing Start Recording.
- Drive around the area to exclude. Make sure that the GPS position stays fixed at all times.
- Stop the recording using Stop Recording.
- The outline should now turn red. This means it’s done recording, and you can move on to recording more exclusions.
Save Area
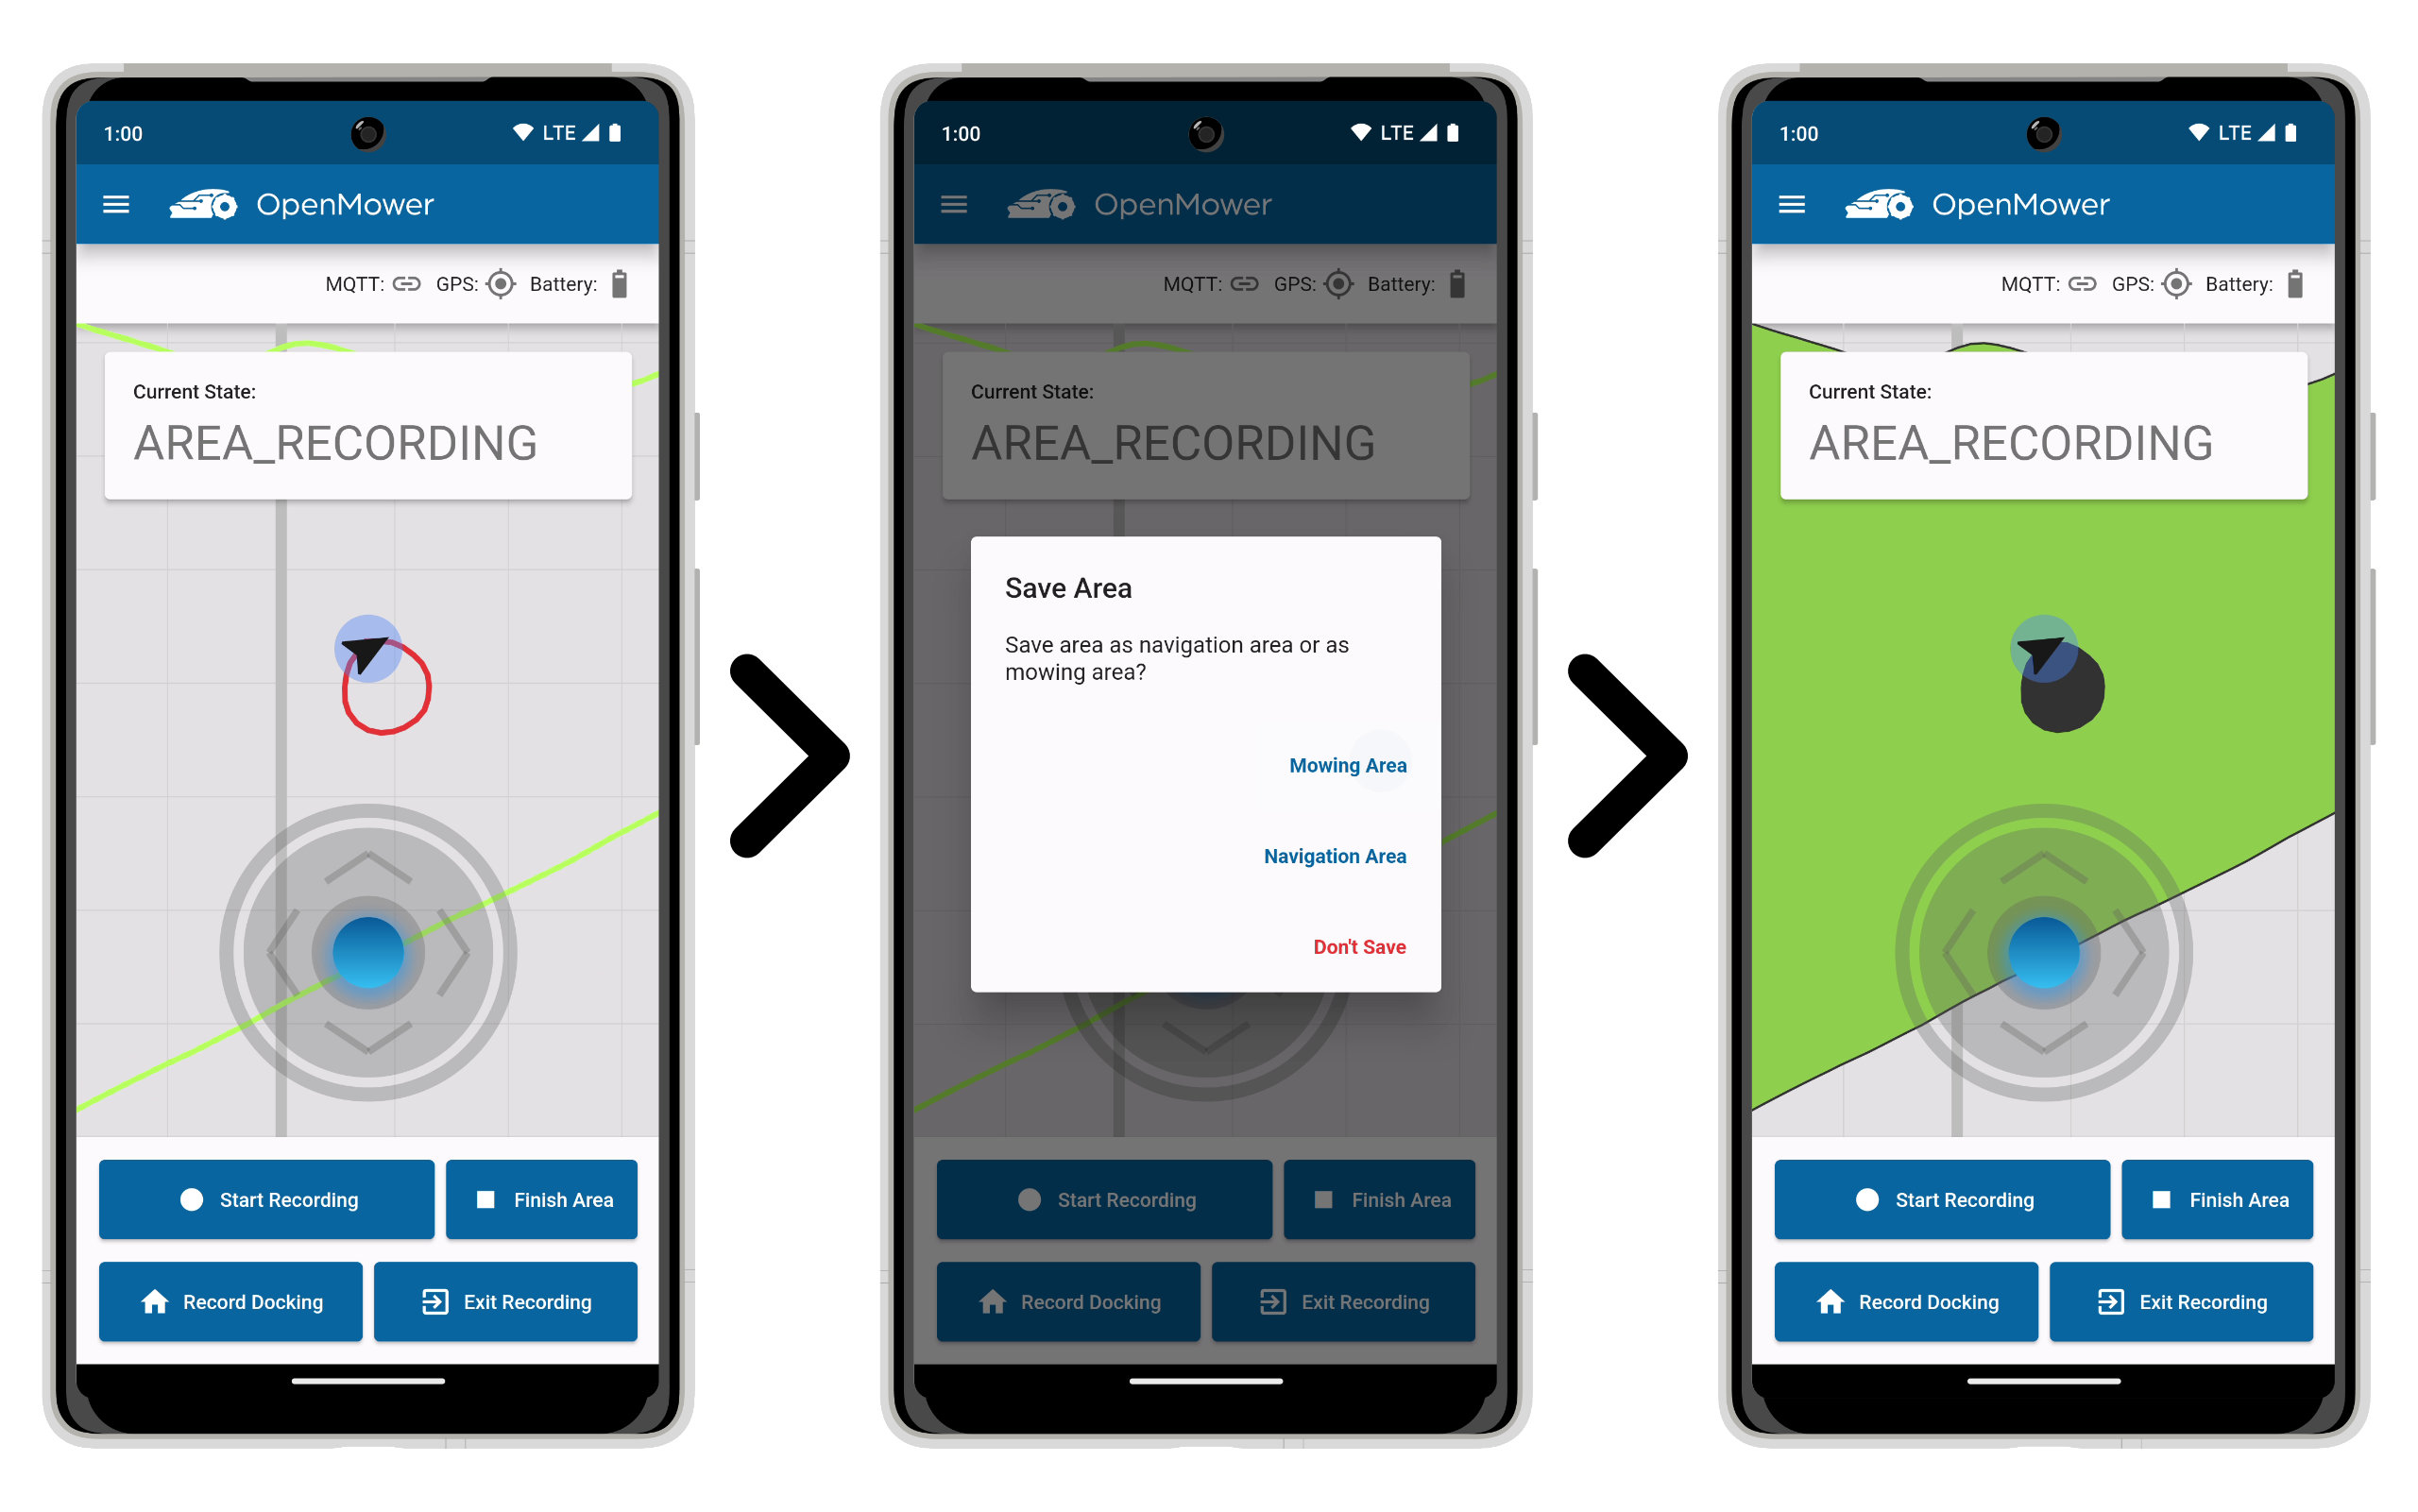
If you are happy with your recording, you can save the area. In order to do this, click the Finish Area button. A dialog will appear asking if you want to save the area as mowing or navigation area. Alternatively, you can also discard the recording.
As soon as the area is saved, the area will turn solid. Mowing areas will be displayed in green, navigation areas will be shown in white.
Record Docking Position

In order to record the docking position, do the following:
- Drive to a location about 2 m in front of your docking station.
- Make sure you have a GPS fix and press the Record Docking button.
- Now drive close to the docking station. The front wheels of the robot should be at the edge of the docking station. Don’t fully drive into the docking station!.
- Make sure you have a GPS fix and press the Record Docking button.
- The app should move the home icon to your current location. Now you can fully drive into the docking station.
Finish Recording
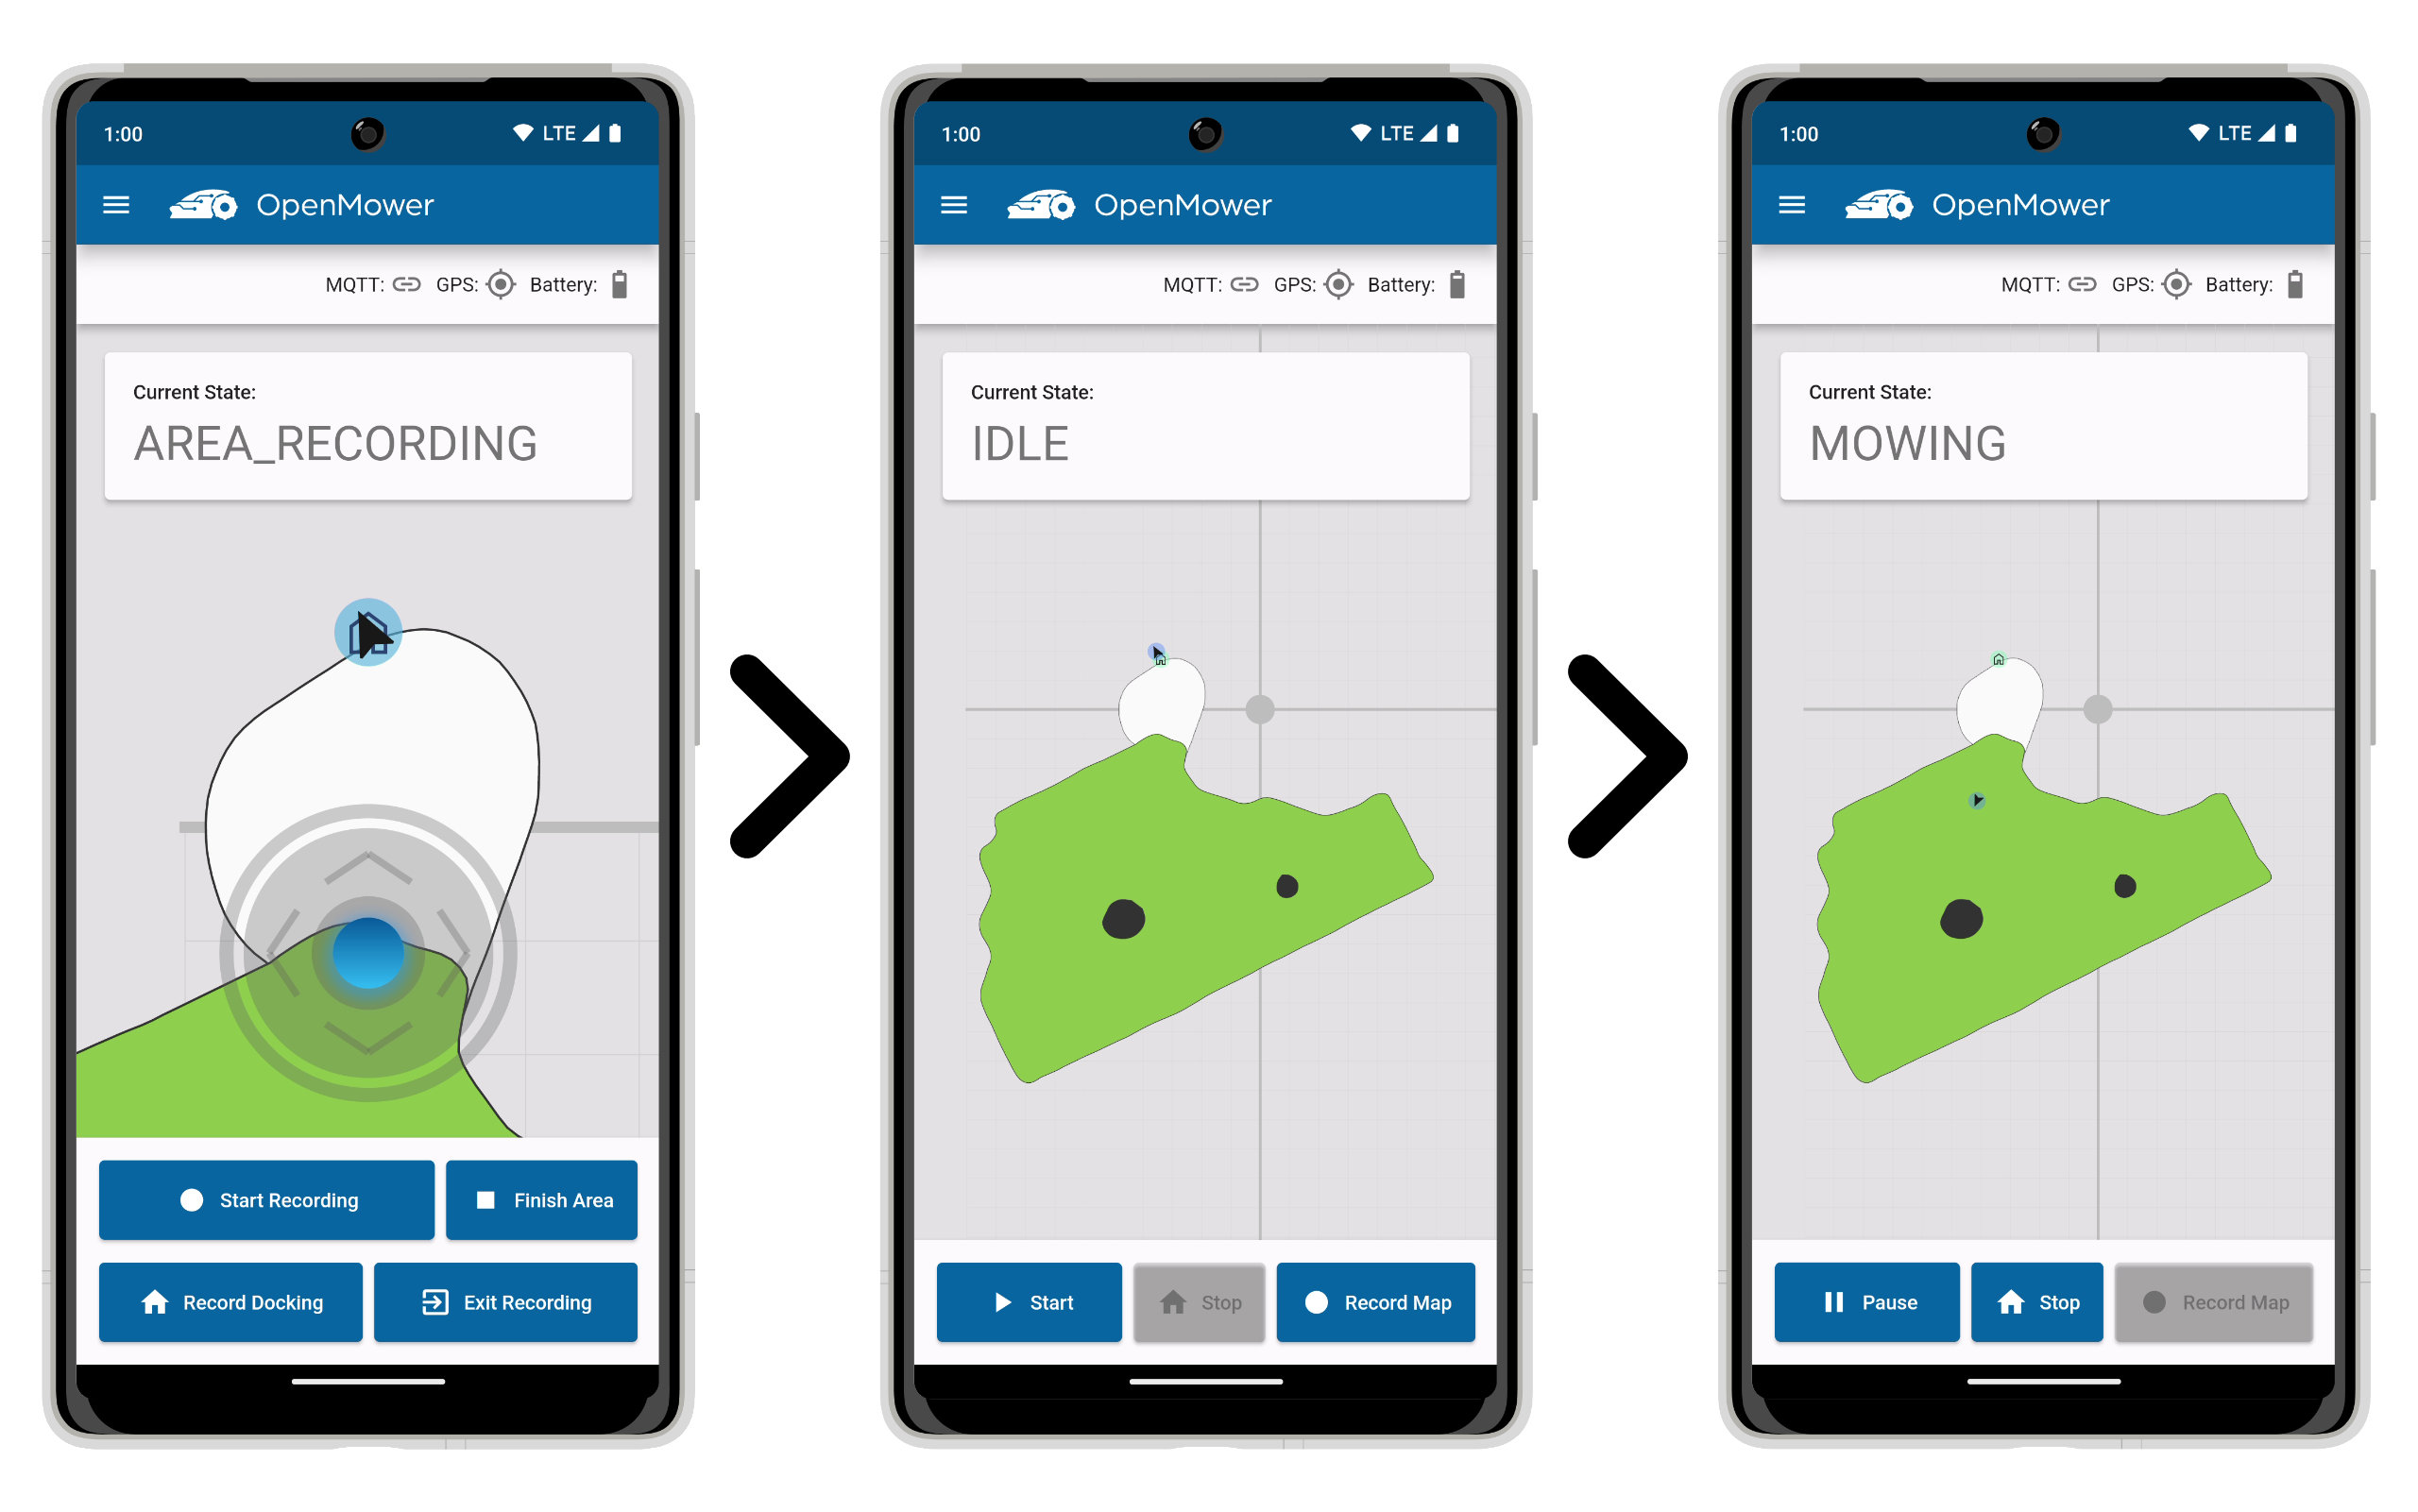
Finish the process by pressing Exit Recording. Now the mower should go to IDLE mode. You should be able to start mowing by pressing the Start button. The mower will undock, wait for GPS and mow the area.